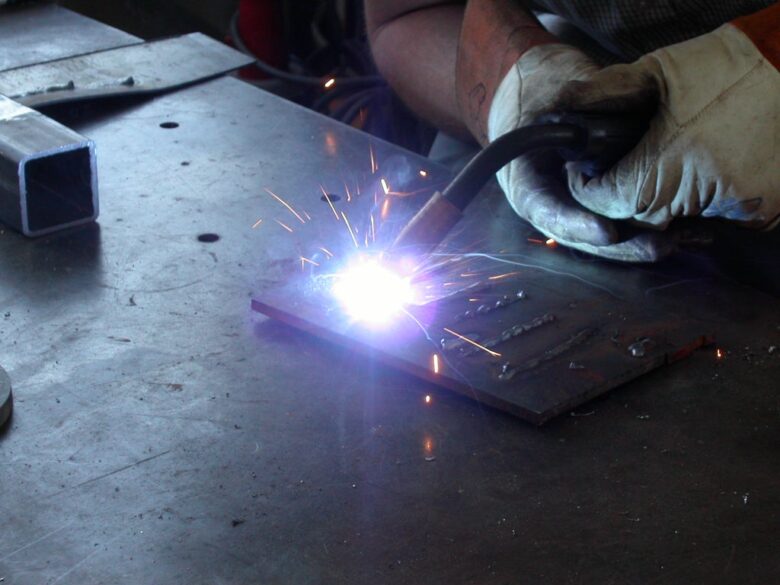
Are you into welding, and have you found yourself in a doubt on where you should start, how to pick a welder for yourself, or which techniques would be a perfect match for you? True, you’ll have a variety of the fuse processes to pick from, but be aware that none of these is convenient for all applications. You would need to consider a few things, like basic processes available or…. well, your craftsmen skills – if you have any.
One of the most important items on the list is investing in a MIG welder – and believe us, this procedure can be a nightmare if you have difficulties determining what to look for. Yet, with a good piece of advice, you can choose a beginner-friendly tool that will help you learn more easily. Let’s get to the basics and narrow the list of things to look for when buying MIG equipment.
How to pick a perfect MIG?
1. Gas cylinder availability

So, this is the first thing to pay attention to when selecting a welder. Is the tool you have chosen capable of having a gas cylinder hooked up to it?
Some models present on the market can function only with flux core welding wire – and this is where we meet with a problem. Flux core makes a slag coating (due to the lack of shielding gas use) that has to be chipped away. Take into consideration the possibility of hooking up a gas cylinder – this could make your performance thrive. If you’re inexperienced, it’s always of great help to visit stores where you can get informed on the equipment. Alternatively, visiting a tool-related website could help anyone – welding.com.au is a beginner-friendly website that helps people get informed on where and how to begin with this craft.
2. Budget-friendliness
Like in any sort of investment, you need to slow down and come to an agreement with yourself, admitting that you might have to splurge some extra money if you wish to buy a good machine.
Yet, you should also think about your skills, and decide whether you’ll use all the modes on the machine in case you buy one of the highest specifications. If you don’t need so many options, it’s better to opt for a simpler and more affordable solution.
3. Voltage
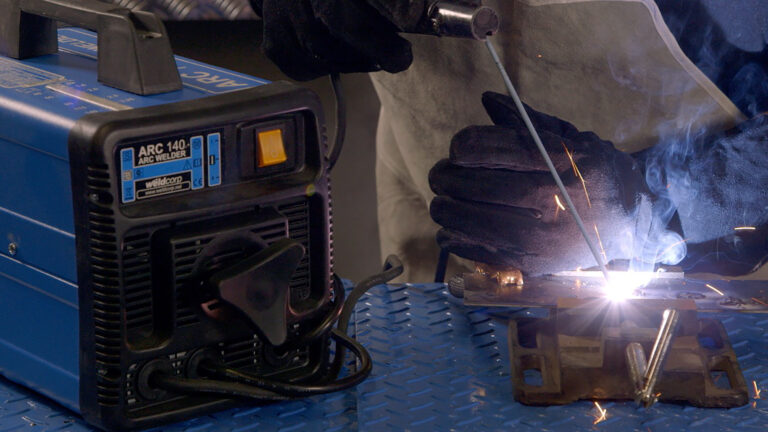
Let’s see the example of the Old ARO welder model. What gives an advantage to this unit is the transformer it possesses – an open-circuit voltage of 15V which is very low works great for car body panels. The more settings in a voltage switch, the smaller the jumps between the settings.
On the other hand, the thyristor control machine has a much finer voltage adjustment. The electronics of this device can be of great help if you’d like to achieve a better setting much easier.
Our suggestion would be to get a machine with a low open-circuit voltage which is on setting 1 and has loads of switch settings.
Another thing to pay attention to when it comes to this aspect is having the proper electric outlet plugged in. A 110 volt MIG is great because you’d be able to install it into almost any household 110-volt outlet. You go to the shop, purchase the gear, plug it in and you are good to go.
Yet, here’s where the catch is: you get narrowed to the amperage the tool produces with a 110-volt outlet. If more power is needed due to fusing thicker metals, in that case you’d need a 220 volt one.
4. Choke setting
This is an essential part of the process since you’d need to take into consideration that the fuse is blowing and that it’s an intrusive explosion. Even though you may think that this is amazing, for example, when it comes to vehicle welding, an explosion of this kind can blow a hole in the panel.
To avoid that, the approach needs to be less aggressive and this needs to be done with the help of the choke – if this part is better, everything will run more smoothly. The problem with this is that it’s set by the manufacturers while the machine is having an excellent performance and is at the top of its game. With all of this in mind, it won’t perform well enough if it’s welding down low, so you’d have to try and make the best of this situation.
5. Wire-feed
On smaller MIGS, wire feeds are car washer bottle motors, and that makes them a bit harsh. The rollers are weak, thin, and wrapped in flexible, cheap plastic.
It’s good to pinch 0.6/0.8mm of wire and push it very deep into a weld pool. This needs to be done properly since that way you’ll have the tool working as smoothly as possible. Two roll feeders are enough for material like steel, however, for soft types of wires, you’ll definitely need more.
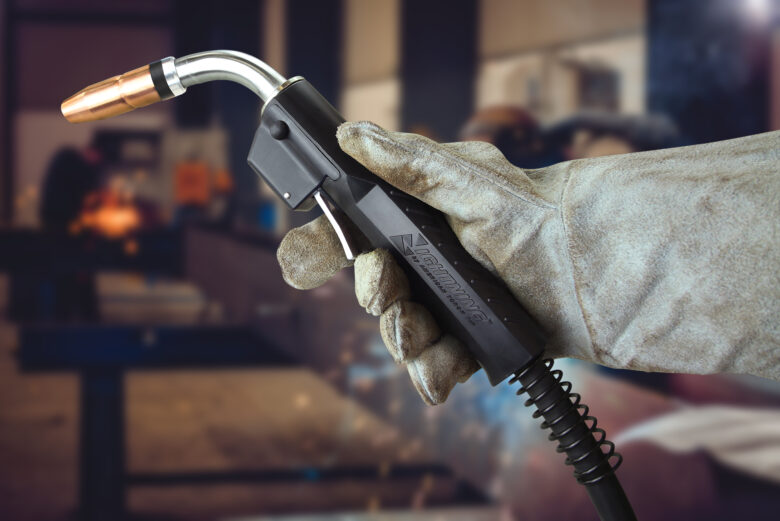
6. Types of torches
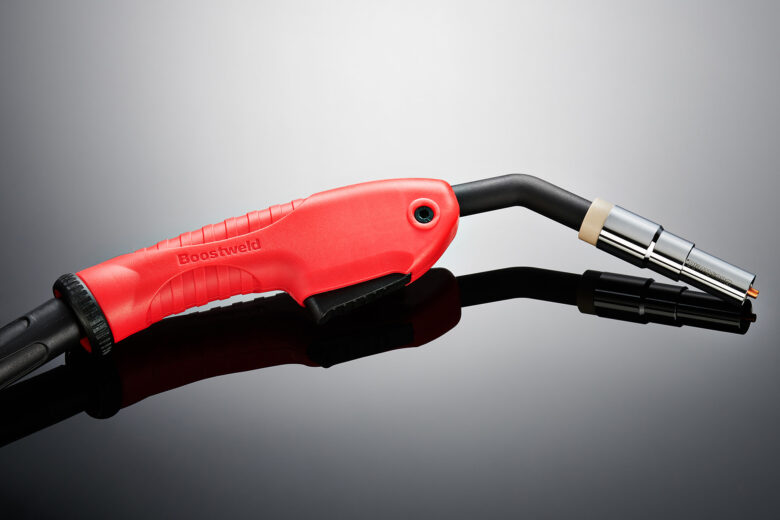
When it comes to torches, we could divide all of them into three categories: direct fitted, manufacturer-specific, and euro adapted.
- Directly fitted torches. These torches are often of poor quality and have plastic Teflon liners inside. You should know that the wire feed will fail sooner or later due to the quality of the wire cuts. And let us tell you – they aren’t so easy to replace.
- Euro adapter torches. This is the most common type and it’s implemented in numerous machines. They’re easily changeable and can be replaced from machine to machine. Unlike the first type, these are much easier to repair or change.
- Manufacturer-specific torches. This type has manufacturer liners of their own and having this in mind, they’re more expensive to replace in case they break. If you can, avoid this type, unless you’re pretty sure your machine will perform much better with those.
We sure hope that this guide has helped you understand better the things you need to pay attention to if you plan on getting a tool of this kind. When in doubt, or if you simply need some reassurance on getting started, come back to this article and remember all these handy pieces of advice!