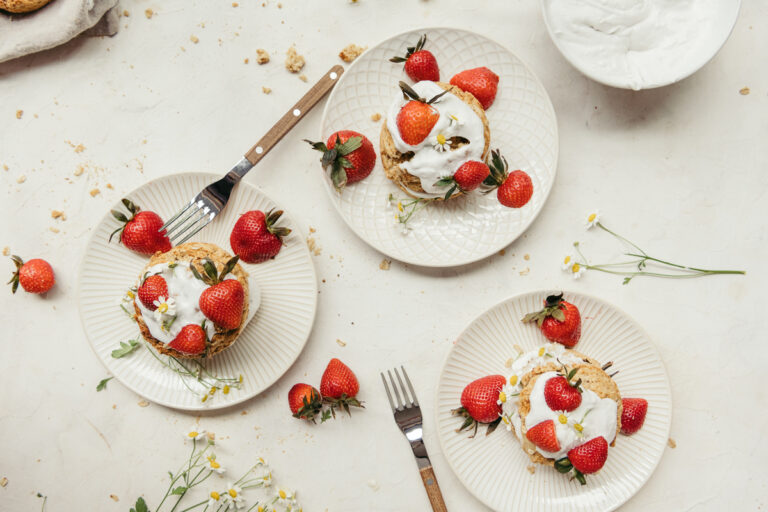
Gathering with family over a delicious meal becomes even more memorable when it concludes with a delightful dessert.
This comprehensive guide introduces a variety of frozen desserts, each carefully crafted to cater to diverse dietary needs and tastes, ensuring that everyone at the table finds their perfect sweet treat.
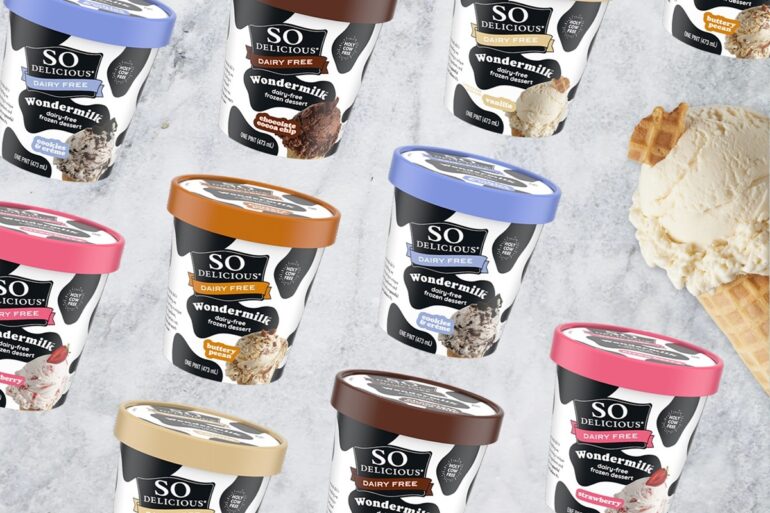
Exploring Dairy-Free Delights
The realm of frozen desserts has been revolutionized with the introduction of dairy-free options, catering to the growing demand for plant-based alternatives. These desserts offer a similar indulgence as traditional ones but are crafted to suit different dietary preferences, making them a hit at family gatherings.
1. Coconut Dream ─ A Dairy-Free Frozen Dessert
One cannot overlook the rising popularity of dairy-free options in the realm of frozen desserts. A dairy-free frozen dessert, like our Coconut Dream, is a sumptuous treat for those who prefer plant-based alternatives.
Ingredients
Crust
- 1 and 1/2 cups of graham cracker crumbs
- 1/2 cup of melted butter
- 1/4 cup of sugar
Filling
- 2 cups of heavy cream
- 1/4 cup of powdered sugar
- 1 teaspoon of vanilla extract
- 1 can (14 ounces) of sweetened condensed milk
- 1 can (13.5 ounces) of coconut milk
- 1/2 cup of shredded coconut
Topping
- 1/2 cup of toasted coconut flakes
- Optional ─ fresh fruit slices or berries for garnish
Instructions
Prepare the Crust
- Preheat your oven to 350°F (175°C).
- In a bowl, mix the graham cracker crumbs, melted butter, and sugar until well combined.
- Press the mixture into the bottom of a 9×13 inch baking dish, forming a firm crust.
- Bake for 10 minutes, then allow to cool completely.
Make the Filling
- In a large bowl, whip the heavy cream with powdered sugar and vanilla extract until stiff peaks form.
- In another bowl, whisk together the sweetened condensed milk and coconut milk until smooth.
- Gently fold the whipped cream into the milk mixture, adding the shredded coconut towards the end.
- Pour this filling over the cooled crust and smooth the top with a spatula.
Chill and Serve
- Sprinkle the toasted coconut flakes over the top of the dessert.
- Refrigerate for at least 4 hours, or overnight for best results.
- Slice and serve chilled, garnished with fresh fruit or berries if desired.
2. Coconut Almond Bliss Balls ─ Refreshing and Dairy-Free
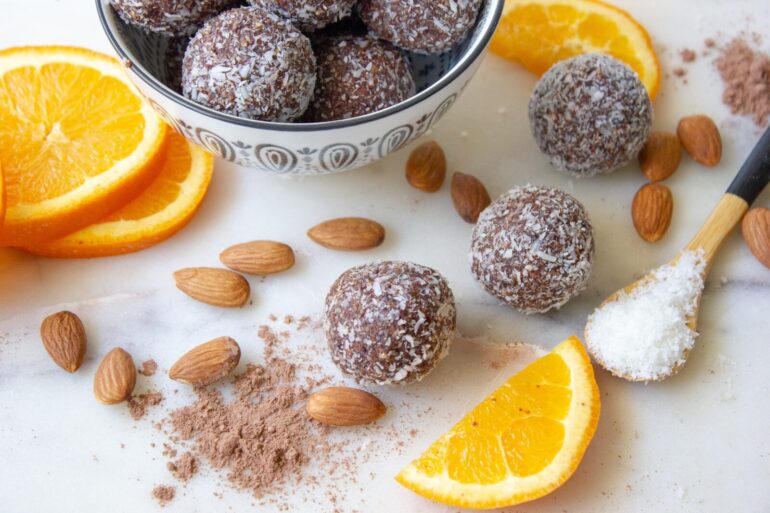
Almond Bliss Balls takes dairy-free indulgence to a new level. This exquisite dessert is made from a smooth base of almond milk, delicately sweetened with honey and a sprinkle of cinnamon.
Ingredients
- Almonds – 1 cup, raw
- Medjool dates – 1 cup, pitted (soak them in warm water for 10 minutes if they are hard)
- Shredded coconut – 1/2 cup, unsweetened (plus extra for coating)
- Coconut oil – 1 tablespoon, melted
- Vanilla extract – 1 teaspoon
- Salt – A pinch
Instructions
Prep the Ingredients: Start by soaking the Medjool dates in warm water for 10 minutes if they are not soft. This will make them easier to blend.
- Blend almonds ─ In a food processor, blend the almonds until they form a coarse meal.
- Add wet ingredients ─ Add the softened dates, melted coconut oil, vanilla extract, and a pinch of salt to the food processor with the almond meal.
- Blend ─ Process all the ingredients until you get a sticky dough-like consistency. If the mixture is too dry, add a bit more coconut oil or a few more dates.
- Form balls ─ Take small amounts of the mixture and roll them into balls. The size is up to you, but typically they are about the size of a walnut.
- Coat with coconut ─ Roll the balls in the extra shredded coconut until they are well coated.
- Chill ─ Place the bliss balls in the refrigerator for at least an hour to firm up.
- Serve and enjoy ─ Once chilled, your Coconut Almond Bliss Balls are ready to be enjoyed!
Its subtly nutty flavor appeals to both adults and children, offering a sophisticated yet comforting taste experience.
Nutritious and Tasty
In the world of frozen desserts, balancing nutrition with delightful flavors is key. Our selections not only tantalize the taste buds but also contribute positively to a balanced diet. Each recipe is crafted with care, ensuring every spoonful is as nutritious as it is delicious.
3. Berry Medley Sorbet ─ Nutritious and Delightful
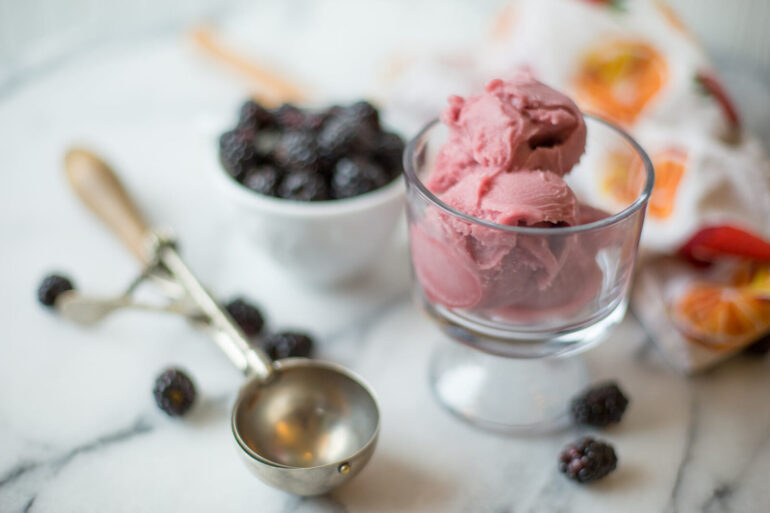
When considering frozen desserts, it’s essential to balance taste with nutritional content. Our Berry Medley Sorbet is a testament to this philosophy. Packed with a mix of raspberries, blueberries, and strawberries, this sorbet offers a nutritious twist. Each serving contains a carefully measured sugar content, ensuring it complements a balanced diet.
Ingredients
- Mixed Berries – 4 cups (you can use fresh or frozen berries like strawberries, blueberries, raspberries, and blackberries)
- Sugar – 1/2 to 3/4 cup, adjust to taste (you can also use honey or agave syrup for a natural sweetener)
- Lemon Juice – 2 tablespoons, freshly squeezed
- Water – 1/2 cup
Instructions
- Prepare the berries ─ If you’re using fresh berries, wash them thoroughly. If you’re using frozen berries, let them thaw a bit before using them.
- Make a simple syrup ─ In a small saucepan, combine the sugar and water. Heat over medium heat, stirring until the sugar has completely dissolved. Let it cool.
- Blend berries ─ In a blender or food processor, blend the berries until smooth. If you prefer a smoother sorbet, you can strain the mixture to remove seeds.
- Mix with lemon juice and simple syrup ─ Add the lemon juice and cooled simple syrup to the berry mixture. Blend again to combine everything well.
- Taste and adjust ─ Taste the mixture and adjust the sweetness or acidity by adding more sugar or lemon juice if needed.
- Chill the mixture ─ Refrigerate the mixture for at least 2 hours, or until it’s completely chilled.
- Churn the sorbet ─ Pour the chilled mixture into an ice cream maker and churn according to the manufacturer’s instructions until it reaches a sorbet-like consistency.
- Freeze to set ─ Transfer the churned sorbet to a freezer-safe container and freeze until firm, usually about 2-4 hours.
- Serve ─ Once the sorbet is set, scoop and serve. If it’s too hard, let it sit at room temperature for a few minutes before serving.
Enjoy! Your homemade Berry Medley Sorbet is ready to enjoy! It’s a perfect, light dessert for warm days or whenever you need a fruity refreshment.
4. Tropical Fusion ─ A Nutritious Treat
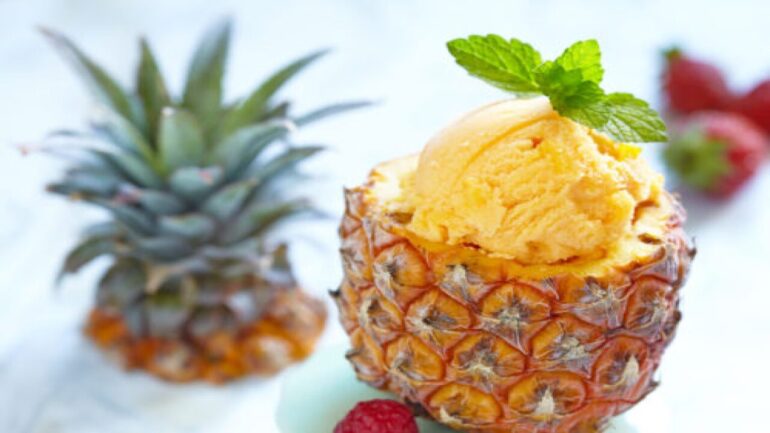
Tropical Fusion is an exotic blend that combines the lush flavors of mango and pineapple. This frozen dessert not only offers a tantalizing taste but also aligns with a nutritious, balanced diet. Here’s the recipe to enjoy this perfect smoothie:
Ingredients
- Mango – 1 cup, chopped and frozen
- Pineapple – 1 cup, chopped and frozen
- Banana – 1, sliced and frozen
- Coconut milk – 1 cup (You can also use almond milk or any other plant-based milk for a dairy-free option)
- Orange juice – 1/2 cup, freshly squeezed
- Honey or agave syrup – 1 tablespoon (optional, adjust to taste)
- Ice cubes – a handful (optional, for extra thickness)
- Optional add-ins ─ Chia seeds, flaxseeds, or a scoop of protein powder for an extra nutritional boost
Instructions
- Prepare fruits ─ Ensure that the mango, pineapple, and banana are chopped and frozen. Freezing the fruits ahead of time helps give the smoothie a thick and creamy texture.
- Blend ingredients ─ In a blender, combine the frozen mango, pineapple, and banana. Add the coconut milk and orange juice. If you’re using honey or agave syrup, add it as well.
- Adjust consistency ─ Blend until smooth. If the smoothie is too thick, you can add more coconut milk or orange juice to reach your desired consistency. If it’s too thin, add a handful of ice cubes and blend again.
- Add optional ingredients ─ If you want to add chia seeds, flaxseeds, or protein powder, do so at this stage and blend until everything is well combined.
- Taste and adjust ─ Give your smoothie a taste. If you prefer it sweeter, you can add a bit more honey or agave syrup.
- Serve immediately ─ Pour the smoothie into glasses and serve immediately for the best flavor and texture.
Enjoy! Enjoy your Tropical Mango Pineapple Frozen Smoothie! It’s a delicious, refreshing, and healthy treat that’s like a mini vacation in a glass.
5. Citrus Burst Cake ─ Lemon and Lime Fusion
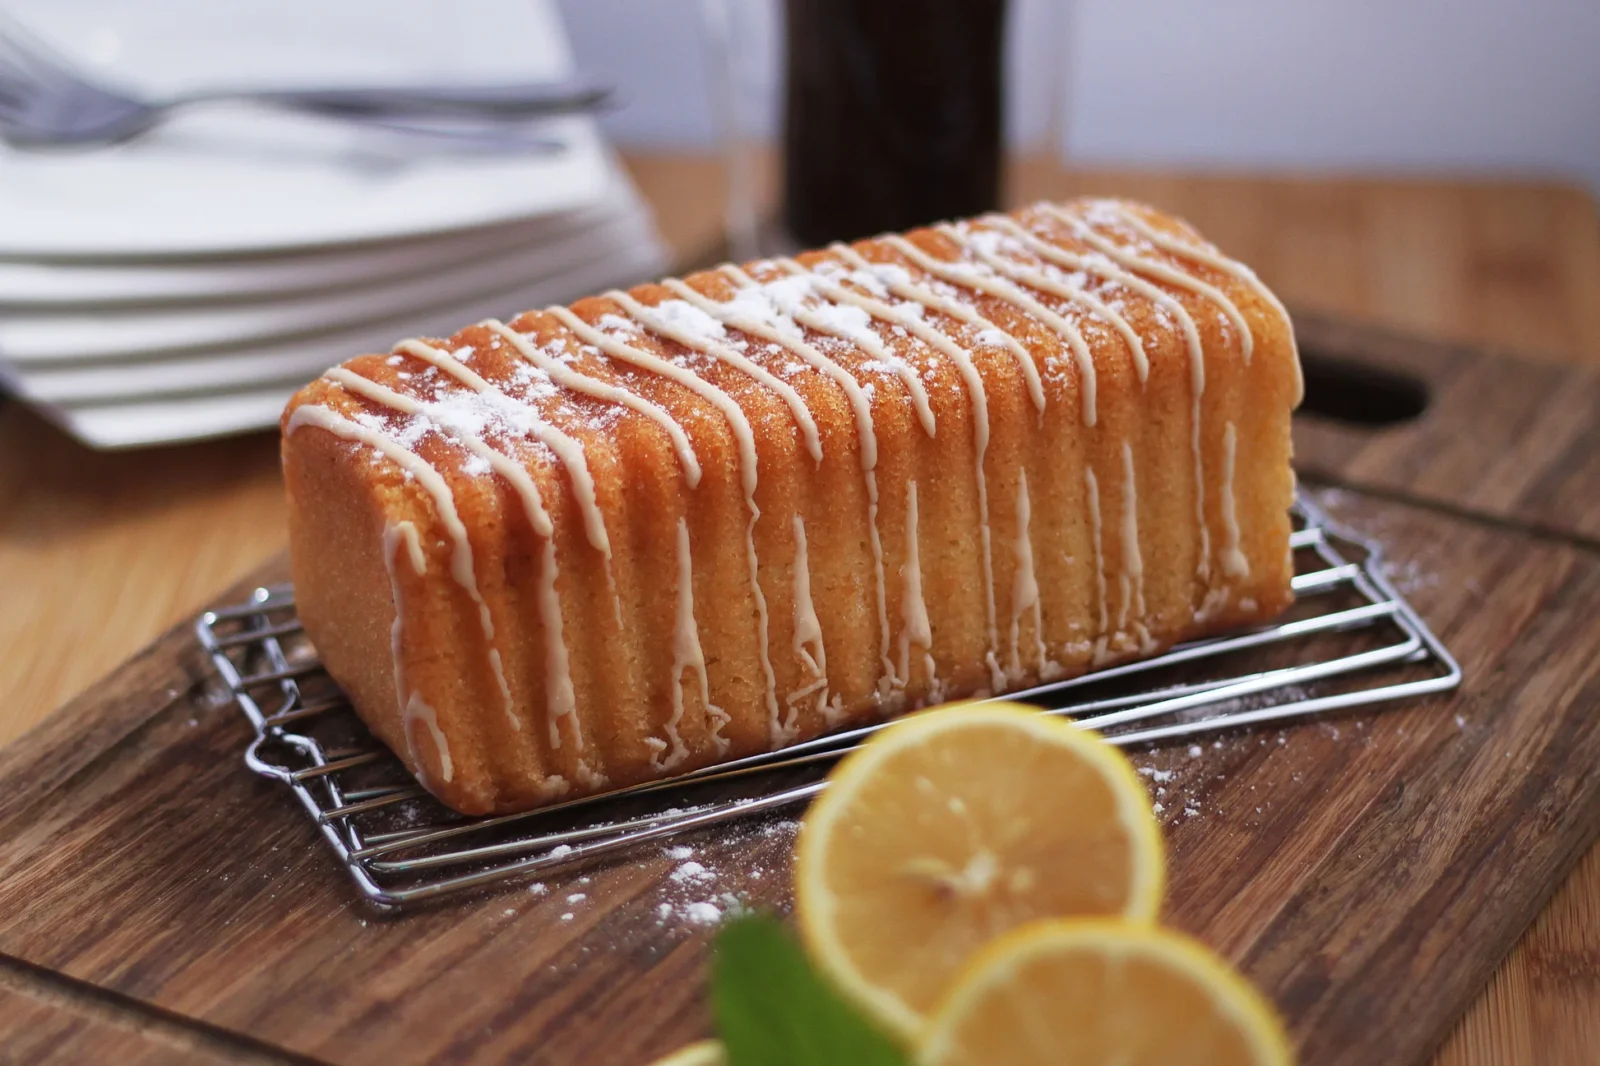
Citrus Burst Cake is a refreshing concoction of lemon and lime, offering a zesty flavor profile. This fusion cuts through the richness of any meal, providing an invigorating taste experience. The vibrant colors and refreshing taste make it a perfect choice for those who prefer a tart twist in their desserts.
Ingredients
For the Cake
- All-purpose flour – 2 cups
- Baking powder – 1 1/2 teaspoons
- Salt – 1/2 teaspoon
- Sugar – 1 cup
- Unsalted butter – 1/2 cup, softened
- Eggs – 3, large
- Vanilla extract – 1 teaspoon
- Milk – 3/4 cup
- Mixed citrus zest – from 1 orange, 1 lemon, and 1 lime
For the Citrus Syrup
- Sugar – 1/2 cup
- Citrus juice – 1/4 cup each from fresh orange, lemon, and lime
For the Glaze
- Icing sugar – 1 cup
- Citrus juice – 2-3 tablespoons (orange, lemon, or lime, as per your preference)
Instructions
Making the Cake
- Preheat oven and prepare pan ─ Preheat your oven to 350°F (175°C). Grease and flour a 9-inch round cake pan.
- Combine dry ingredients ─ In a bowl, whisk together the flour, baking powder, and salt. Set aside.
- Cream butter and sugar ─ In a large bowl, beat the softened butter and sugar until light and fluffy.
- Add eggs and vanilla ─ Add eggs one at a time, beating well after each addition. Stir in the vanilla extract.
- Mix in dry ingredients and milk ─ Add the flour mixture in three additions, alternating with milk. Start and end with the flour mixture. Mix until just combined.
- Add citrus zest ─ Fold in the mixed citrus zest.
- Bake ─ Pour the batter into the prepared pan and smooth the top. Bake for 30-35 minutes, or until a toothpick inserted into the center comes out clean.
- Cool ─ Let the cake cool in the pan for 10 minutes, then transfer it to a wire rack.
Making the Citrus Syrup
- Combine ingredients ─ In a small saucepan, combine the sugar and mixed citrus juice. Bring to a simmer over medium heat, stirring until the sugar dissolves.
- Simmer ─ Let it simmer for a few minutes until it thickens slightly.
- Pierce and pour ─ Using a skewer, poke holes all over the top of the warm cake. Slowly pour the hot citrus syrup over the cake, allowing it to soak in.
Making the Glaze
- Mix icing sugar and citrus juice ─ Whisk together the icing sugar and enough citrus juice to achieve a pourable consistency.
- Glaze the cake ─ Once the cake has completely cooled, pour the glaze over the cake, allowing it to drip down the sides.
- Serve ─ Let the glaze set for a few minutes before slicing and serving the cake.
Each dessert not only satisfies the taste buds but also brings people together, celebrating the shared experience of enjoying flavours and creating stories.