An engagement ring is not just a piece of jewelry, but a symbol of love and commitment between two people. It’s a significant item that will be worn every day, which makes it important to choose one that’s perfect for you. While there are many stunning engagement ring options available, some people prefer to make their own. This option allows you to create a unique and personalized one that suits your personality and style.
From the gemstone to the metal and the design, every aspect of the ring can be tailored to your preferences. Whether you choose a classic round diamond or an elegant oval-cut diamond, this can be a rewarding and unforgettable experience.
Step 1: Determine Your Budget
The first step is to determine your budget. They can vary greatly in price depending on the materials used, the complexity of the design, and the size of the diamond or other gemstone. It’s important to set a budget and stick to it so that you don’t overspend. You can also consider using alternative materials such as moissanite or colored gemstones to save money.
Step 2: Choose a Gemstone
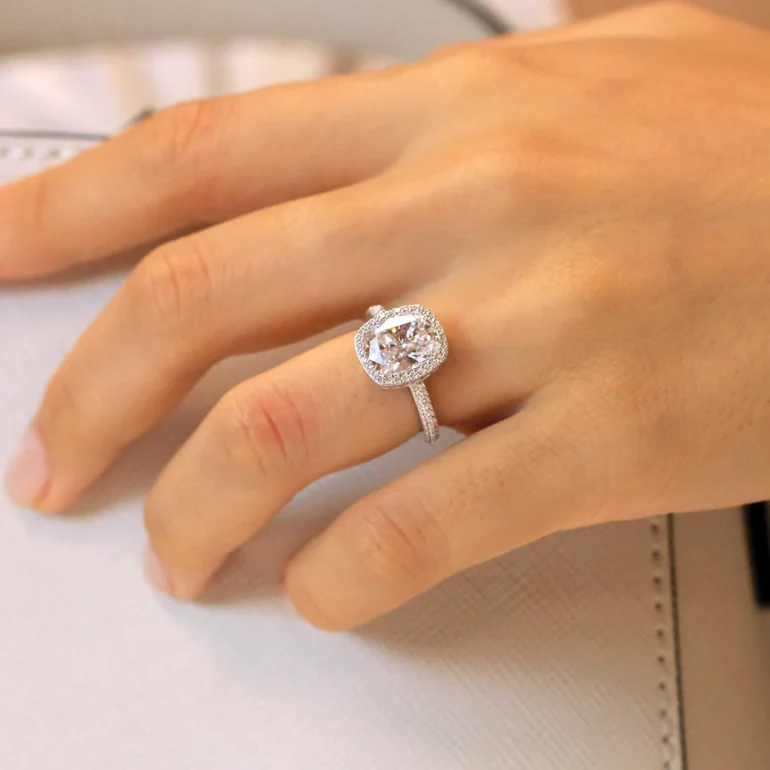
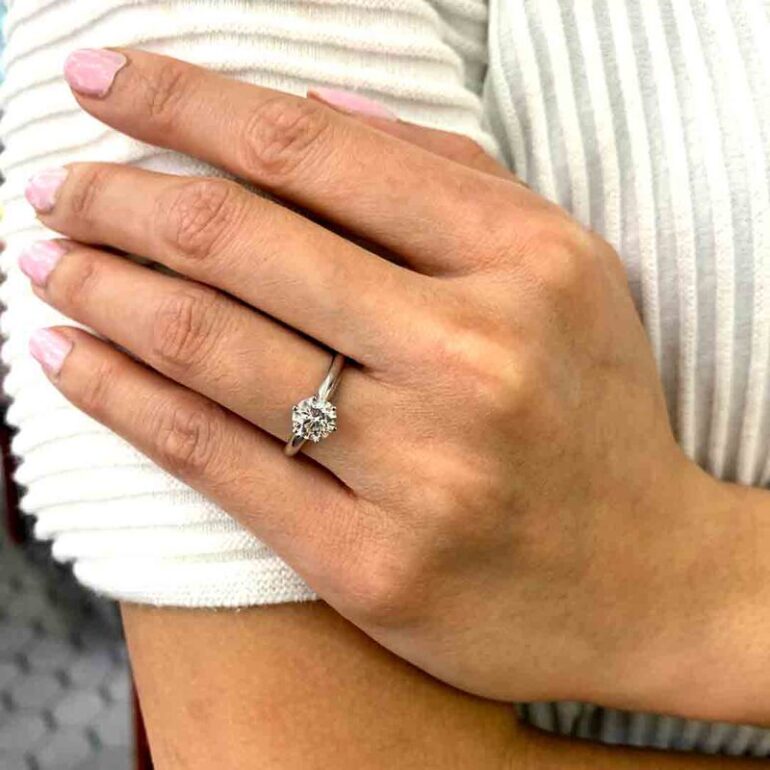
The gemstone is the focal point of an engagement ring, so it’s important to choose one that you love. Diamonds are the traditional choice, but there are many other options available such as sapphires, emeralds, and rubies. Think about the color, size, and shape of the gemstone that you want.
Step 3: Select a Metal
Selecting the metal is an essential step in the design process. The metal not only affects the look of the ring but also its durability and maintenance. The most popular metals used for them are platinum, white gold, yellow gold, and rose gold.
Platinum is a rare and valuable metal that is known for its durability and strength. It has a silvery-white color and is hypoallergenic, making it a popular choice for those with sensitive skin. Platinum is also a popular choice for those who want a classic and timeless look.
White gold is a popular alternative to platinum, and it has a similar look but is less expensive. It is made by alloying yellow gold with other metals, such as silver and palladium, to give it a white color. However, it requires more maintenance than platinum as the rhodium plating on the surface wears off over time and needs to be reapplied to maintain its white color.
Yellow gold is a classic choice that has been used in jewelry for centuries. It has a warm and traditional look that many people love. It is alloyed with copper and silver to give it its characteristic color and strength.
Rose gold is becoming increasingly popular due to its unique and romantic look. It is created by alloying yellow gold with copper, which gives it a pinkish-red hue. Rose gold is a perfect choice for those who want a vintage-inspired look.
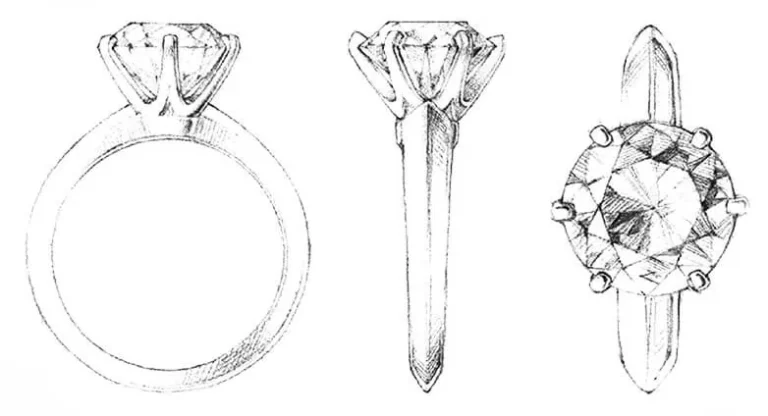
Step 4: Choose a Design
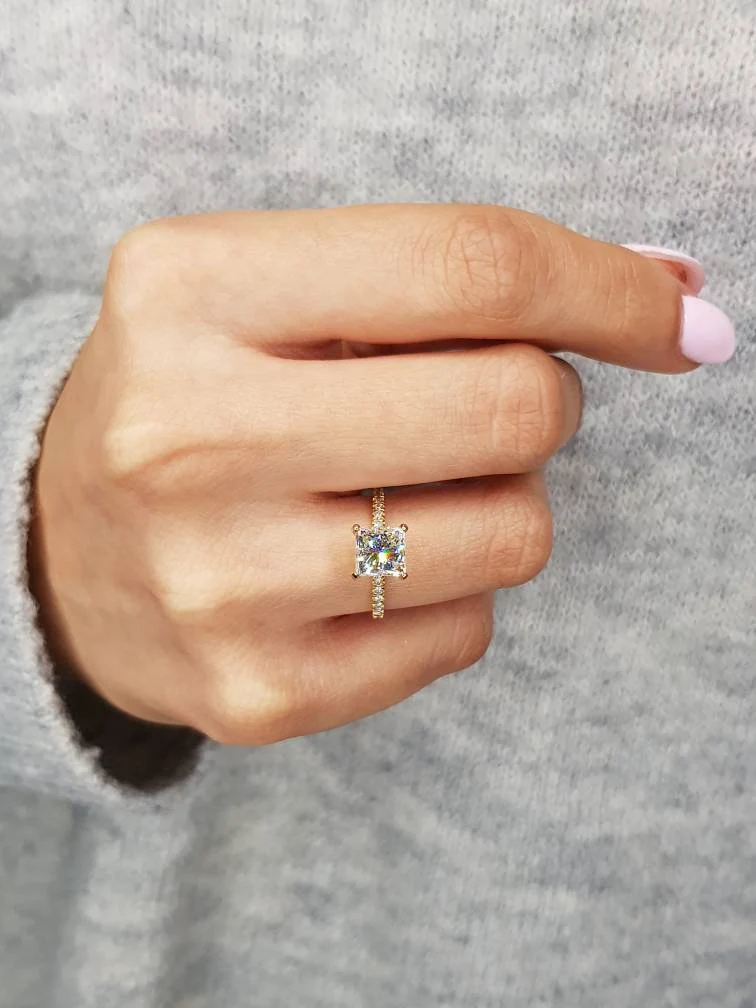
The design of your engagement ring is completely up to you. Look for inspiration online or in jewelry stores. Consider the shape and style of the band, the type of prongs that will hold the gemstone, and any additional details or accents that you want to include.
Step 5: Work with a Jeweler or Designer
Once you have an idea of what you want your engagement ring to look like, it’s time to work with a jeweler or designer to bring your vision to life. They can provide you with a 3D rendering so that you can see what it will look like before it’s made. You can make any adjustments or changes at this point to ensure that it is perfect.
Step 6: Finalize Your Design
Finalizing your design is the last and most exciting step of creating your own engagement ring. After considering all of the options, you’ll have a clear vision of what you want your ring to look like. Now it’s time to work with your jeweler or designer to bring your vision to life.
Your designer will create a 3D model or a wax mold to ensure that everything is perfect. This is the time to make any final adjustments or changes to the design. Make sure that you’re happy with every aspect of the ring, from the shape and size of the diamond to the color and texture of the metal.
Once you’ve approved the final design, the jeweler will begin crafting the ring. The process can take several weeks or months, depending on the complexity of the design and the availability of materials. During this time, you can anticipate receiving updates and photos from your jeweler to keep you informed about the progress.
Finally, your custom-made engagement ring will be ready! It will be a unique and special piece of jewelry that reflects your love and commitment to each other. Wearing it will be a daily reminder of the time and effort that went into creating it. It will be a symbol of your unique love story and a lasting testament to the bond that you share.
Step 7: Receive Your Custom Engagement Ring
The final step is to receive your custom engagement ring. This is an exciting moment, as you’ll see your vision come to life. Try on the ring and make sure that it fits well and looks just as you imagined. You can now wear your unique and special engagement ring with pride.
Crafting Your Own Love Story: The Enduring Beauty of Custom-Made Engagement Rings
In conclusion, this is a meaningful way to symbolize your love story. A custom-made ring is not just a piece of jewelry, but a tangible representation of your unique love and commitment to each other. From choosing the perfect gemstone to designing the band, the process of making your own engagement ring is a labor of love that can bring you closer together. It’s an opportunity to express your individuality and create something that’s truly one-of-a-kind.
And every time you glance at your circle, you’ll be reminded of the love and effort that went into making it. With a custom-made engagement ring, you can create a lasting symbol of your love that’s as enduring and beautiful as your relationship.